Thru-Axle Hub Fixing Rod: Truing Stand Setup (12–20mm)
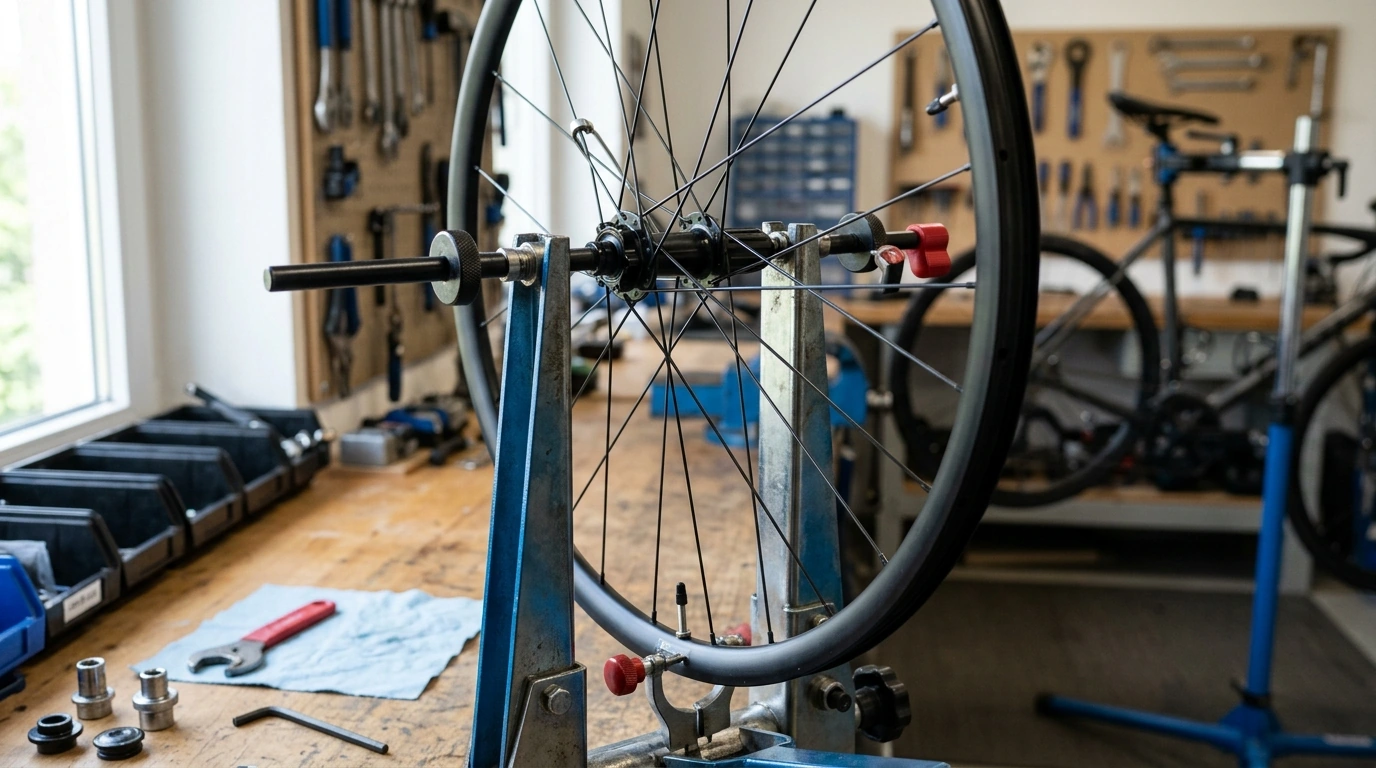
Thru-Axle Hub Fixing Rod for Wheel Truing Stands (12/15/20mm): Setup, Fit, and Use
A thru-axle hub fixing rod adapts a truing stand to modern hubs so a wheel can be centered, clamped, and spun smoothly for accurate corrections. Instead of “making do” with quick-release cones on a thru-axle wheel, the right rod helps the hub seat more naturally, cuts down on side-to-side play, and makes measurements easier to repeat. Below are practical checks for confirming fit (12/15/20mm) plus straightforward steps for stable truing sessions at home or in a small workshop. For more guidance, see Bike Adjustment Table Adapter – Front Wheel Shaft Hub Tool For ….
What a Thru-Axle Hub Fixing Rod Does
- Replaces the quick-release-style interface with a thru-axle-style support so the hub seats more like it does in the frame or fork.
- Helps maintain consistent wheel centering in the stand, improving repeatability when checking lateral and radial runout.
- Reduces wobble caused by mismatched adapters or loose clamping, especially on wider hub end caps.
- Makes it easier to swap between wheels that share the same thru-axle size without reconfiguring the entire stand.
When the hub is supported cleanly, the rim’s movement at the indicator reflects the wheel’s true condition—not shifting end caps or a slightly cocked axle interface. That means fewer “chasing the wobble” moments and more confident spoke adjustments.
Compatibility Checklist Before Buying
- Confirm hub axle standard: most modern bikes use 12mm (rear road/gravel), 15mm (front MTB), or 20mm (some downhill/BMX-style setups).
- Measure or verify the hub end cap/axle bore size; don’t rely only on frame/fork labeling if the hub has been changed.
- Check truing stand interface: ensure the stand can accept a fixing rod/adapter style rather than only quick-release cones.
- Consider hub spacing and rotor clearance: disc rotor position can affect how the wheel sits between calipers/indicators on certain stands.
- Verify the rod length and clamping method suit the stand’s uprights and the hub’s end caps.
Common Thru-Axle Sizes and Where They’re Typically Used
| Axle size | Typical position | Common bike types | Notes for truing stand setup |
|---|---|---|---|
| 12mm | Rear (most common), sometimes front | Road, gravel, many modern MTBs (rear) | Often paired with 142/148 spacing; ensure the hub is centered between stand uprights. |
| 15mm | Front | MTB, trail, enduro | Usually easy to seat firmly; check that the rod supports the hub end caps without binding. |
| 20mm | Front | Downhill, some freeride setups | Larger bore; confirm adapters match 20mm exactly to avoid play. |
How to Install and Center the Wheel in a Truing Stand
- Clean the hub interfaces. Wipe end caps and the axle bore so the rod seats flush and doesn’t rock on grit or dried sealant.
- Select the correct size (12/15/20mm). Insert the rod straight through the hub. If it wants to “start crooked,” back out and re-align rather than forcing it.
- Clamp evenly on both sides. Tighten the stand’s supports symmetrically so the wheel centers naturally instead of being pulled to one side.
- Check free spin. Rotate the wheel and feel for grinding or intermittent resistance. If it binds, loosen, re-seat the hub on the rod, and clamp again.
- Confirm centering before adjusting spokes. Compare clearance to each side of the stand (or use centering marks if your stand has them). The goal is a repeatable “home position” every time you remount the wheel.
A helpful routine is to lightly clamp, spin once, then snug both sides in small increments. That reduces the chance of clamping the wheel slightly off-axis and seeing different readings later.
Using the Stand for Accurate Truing
For deeper technique refreshers, Park Tool’s repair library and Sheldon Brown’s wheelbuilding references are reliable starting points: Park Tool — Wheel and Spoke Repair and Sheldon Brown — Wheelbuilding and Truing.
Troubleshooting Fit and Stability Issues
Care, Storage, and Long-Term Accuracy
Product Options (In Stock)
- Bike Wheel Truing Stand Thru Axle Hub Fixing Rod for 12/15/20mm Hubs — a compact add-on designed to seat and support thru-axle hubs for stable spinning and repeatable measurements.
- Maximize Function, Minimize Clutter | Multifunctional Room Layouts eBook — helpful if you’re organizing a small work area and want a cleaner, more usable tuning/maintenance corner.
- One Room, Real Progress: A Simple Step-by-Step Guide for Stress-Free Home Organization — a simple system for tidying tools and parts so setup time stays fast and consistent.
FAQ
Will a 12/15/20mm fixing rod work with both front and rear wheels?
It depends on the hub’s axle bore and end caps, not whether the wheel is “front” or “rear.” Many rear hubs are 12mm and many front hubs are 15mm, but there are exceptions, so verify your hub standard and confirm your truing stand has clearance for the rotor and cassette.
Why does the wheel show different runout every time it’s clamped?
Uneven clamping, debris on the end caps, or a mismatched axle size can let the hub shift slightly each time. Use a repeatable routine: seat the hub fully, lightly clamp both sides, do a free-spin check, then snug each side evenly in small increments.
Do disc rotors need to be removed when truing?
Not always. If your stand’s uprights or indicators interfere with the rotor (rubbing or catching), remove the rotor or reposition the indicators; if there’s plenty of clearance, the rotor can typically stay installed.






Leave a comment