Compost Curious: Easy Composting From Kitchen Scraps
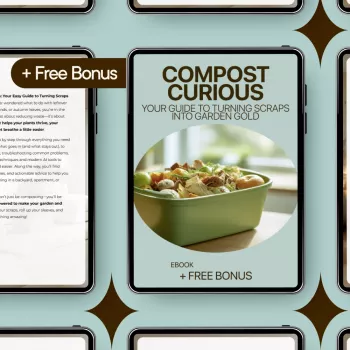
Compost Curious: Turn Kitchen Scraps Into Garden Gold (Without Overthinking It)
Composting doesn’t need a backyard setup, fancy bins, or a science degree. It’s simply a repeatable routine: collect the right scraps, balance them with dry materials, and give the pile a little air and time. Our team put together Compost Curious: Your Guide to Turning Scraps into Garden Gold for real life—small spaces, busy weeks, and the very normal “am I doing this right?” moments. If your goal is less waste and healthier soil, you can start with a simple system that stays clean, low-odor, and easy to maintain.
What this eBook helps you do—right away
- Start composting with a setup that matches your space (apartment, patio, or yard), instead of forcing a one-size-fits-all method.
- Understand core composting basics—what breaks down, what stalls, and why balance matters—without getting buried in jargon.
- Build a simple routine for collecting scraps and “browns” so composting stays tidy and low-odor.
- Spot early warning signs (too wet, too dry, not enough air) and fix them before they become a reason to quit.
- Know when compost is ready and how to use it in containers, beds, or around trees without guesswork.
The composting basics, explained in plain language
Compost needs four things working together: greens (nitrogen), browns (carbon), moisture, and oxygen. When one is missing, the pile slows down or smells off. Greens are typically fresh and wet (think fruit and veggie scraps, coffee grounds). Browns are dry and fibrous (dry leaves, shredded paper, plain cardboard). A beginner-friendly rule of thumb: add browns every time you add kitchen scraps.
Moisture should feel like a wrung-out sponge—damp, not dripping. Too wet can lead to odors; too dry slows decomposition. Oxygen is the “secret ingredient” many beginners miss: turning, stirring, or aerating helps the pile heat up and break down faster.
Quick-start cheat sheet: what to add and what to skip
| Add freely (beginner-friendly) | Use carefully (small amounts) | Skip for basic home compost |
|---|---|---|
| Vegetable & fruit scraps | Citrus peels | Meat or fish scraps |
| Coffee grounds & paper filters | Onion/garlic skins | Dairy (cheese, yogurt) |
| Tea bags (plastic-free) | Cooked foods (if avoiding pests is hard) | Oily foods and grease |
| Dry leaves | Eggshells (crushed) | Pet waste |
| Shredded cardboard/paper (plain) | Wood ash (tiny amounts) | Glossy/treated paper, charcoal briquettes |
Pick a setup that matches your space (and your tolerance for mess)
The “best” compost system is the one you’ll actually use. You can keep it simple, contained, and routine-friendly—especially if you place it somewhere convenient year-round.
- Countertop collection: Use a small container with a lid for daily scraps. Empty it every 1–3 days to keep odors down.
- Small-space composting: A compact bin or tumbler keeps things contained and makes turning simpler when outdoor space is limited.
- Backyard pile or bin: Ideal for yard waste like leaves. A basic enclosure keeps the pile tidy and helps retain heat.
- Where to place it: Choose a spot you’ll reach even when it’s cold, rainy, or you’re busy—distance is a common reason composting routines fall apart.
- Make it repeatable: A “good enough” setup you maintain beats an impressive one you avoid.
Common compost problems and fast fixes
Most compost problems are just imbalance—too wet, too dry, or not enough air. The fix is usually quick.
- Bad smell (sour/rotten): Usually too wet or too many greens. Add browns (dry leaves, shredded cardboard), mix to add air, and keep fresh scraps buried.
- Fruit flies indoors: Keep your collection container clean, empty it more often, and freeze scraps if needed. Keep a small “browns stash” nearby to cover new additions.
- Nothing is breaking down: The pile may be too dry, too cold, or lacking greens. Add a bit of moisture, mix for oxygen, and include more nitrogen-rich material.
- Pile is slimy or compacted: Break it up, add dry browns, and avoid thick wet mats (like clumped grass clippings).
- Critters: Skip meat and dairy, bury food scraps, and keep a consistent brown cover layer to reduce odors that attract pests.
When compost is ready—and how to use it without guessing
Finished compost looks dark and crumbly and smells earthy. The original ingredients should be hard to recognize (a few twig bits are normal). If it still heats up noticeably after turning, it’s still working—let it mature a bit longer for gentler use around plants.
A simple weekly rhythm that makes composting stick
Helpful resources (if you want to go deeper)
- U.S. Environmental Protection Agency (EPA) — Composting at Home
- Cornell Waste Management Institute — Composting (Basics & Troubleshooting)
Recommended reads from our store
- Compost Curious: Your Guide to Turning Scraps into Garden Gold | Beginner-Friendly eBook with Composting Basics Explained
- One Room, Real Progress: A Simple Step-by-Step Guide for Stress-Free Home Organization (great if you want a simple routine for the kitchen area where scraps collect)
- Maximize Function, Minimize Clutter | Multifunctional Room Layouts eBook (helpful for making small-space systems—like a compost “station”—feel natural)
FAQ
Does composting smell bad?
A healthy compost pile should smell earthy, not rotten. Bad odors usually mean it’s too wet, too heavy on kitchen scraps, or lacking airflow—adding browns and mixing to introduce oxygen typically fixes it fast.
How long does compost take to break down?
Most home compost takes a few months to a year depending on how often you turn it, how balanced it stays, how small you chop scraps, and the season. For beginners, consistency matters more than speed—small, steady habits beat occasional big “resets.”
Can composting work in a small apartment?
Yes, as long as you keep things contained and routine-based: use a lidded countertop container, empty it frequently, and keep browns ready to cover fresh scraps. Freezing scraps can also help you manage odor and pests until you’re ready to add them to your bin.






Leave a comment